+86-17692703999
+86-17692703999 No. 6, West Side Auxiliary Road,
Sunshine Street, Linxi County, Xingtai
City, Hebei Province
Sunshine Street, Linxi County, Xingtai
City, Hebei Province

Views: 0 Author: Site Editor Publish Time: 2026-08-02 Origin: Site

Using an incorrectly sized attachment poses severe operational risks to your machinery. Mismatched components lead to unsafe rigging practices, accelerate wear on the dipper arm, and trigger costly unscheduled downtime. Mechanics often struggle in the field when parts fail to align. You simply cannot rely on rough estimates for heavy machinery.
Sizing attachment hardware requires exact mechanical tolerances. Whether you are retrofitting an older machine or adapting a brand-new bucket, precision remains non-negotiable. Even a millimeter of deviation severely impacts digging geometry and structural safety. Operators must approach this task methodically.
This guide provides a straightforward, field-tested framework for measuring, specifying, and sourcing the exact pin size required for your machine's configuration. You will learn the exact steps to identify your required dimensions. We will explore how to avoid common measurement errors and secure the ideal components for your fleet.
Equipment managers often underestimate the financial impact of poor fitment. A seemingly minor dimensional mismatch creates cascading failures across your heavy equipment. These failures drain maintenance budgets rapidly.
Undersized parts inevitably cause "slop" or excessive play inside the joint. This movement acts like a hammer during operation. Every time the operator curls the bucket, the loose component strikes the internal walls. This repeated impact destroys bucket bosses over time. It causes premature wear on excavator arms and linkage components. If you ignore this slop, you will eventually face expensive line-boring repairs. Mechanics must weld and re-machine the entire arm to restore the original bore size.
Oversized components halt field operations immediately. Oversizing by just a fraction of a millimeter creates severe installation problems. Mechanics cannot drive replacement parts into the linkage. They often waste hours trying to force parts together. Sometimes they resort to freezing parts or applying extreme heat. These field delays disrupt project timelines. Crews stand idle while managers scramble to source correct replacements.
Safety remains the highest priority on any job site. Improperly rated or poorly sized load-bearing components compromise structural integrity. Heavy-duty lifting and digging demand perfect fitment. Mismatched joints risk catastrophic failure during heavy lifts. A snapped linkage drops the load unpredictably. This endangers ground personnel instantly. Furthermore, using incorrect hardware violates manufacturer safety compliance standards. Insurance claims become complicated if investigators discover improper attachment rigging.
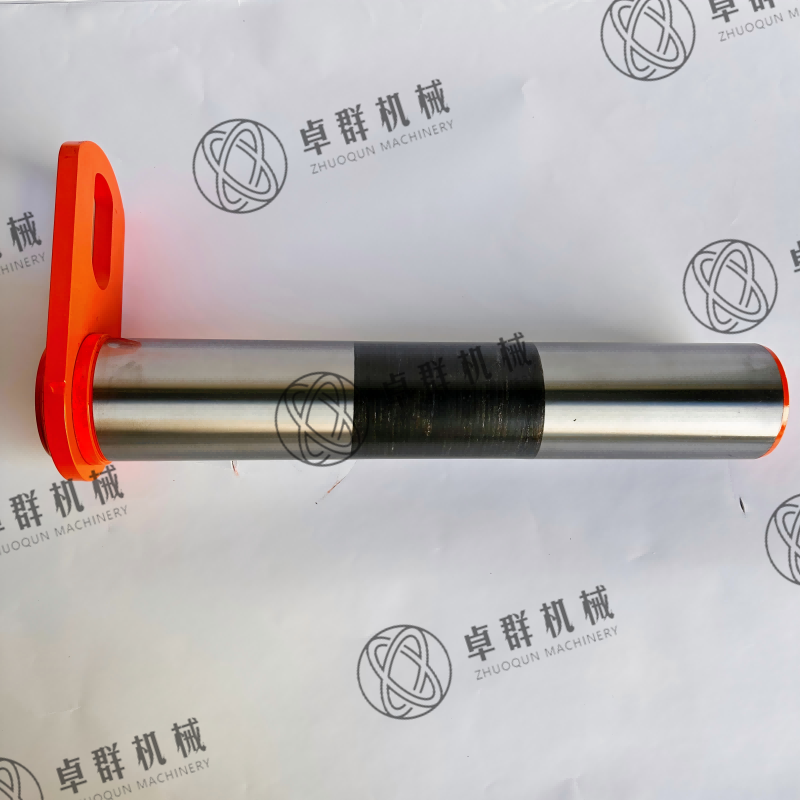
You must understand your equipment thoroughly to guarantee a perfect fit. Evaluating excavator bucket pin specifications involves three critical measurements. Missing just one of these metrics guarantees an incompatible attachment.
Imagine a clear technical diagram of your attachment setup. You need to identify three primary areas. First, look at the thickness of the rod itself. Second, observe the space between the mounting brackets on the bucket. Third, note the distance between the two main pivot points. These represent your three golden dimensions.
This metric must be exact. Standard sizes typically range from 25mm to over 130mm depending on machine tonnage. Mini excavators might use 30mm sizes, while 30-ton machines require 80mm or larger.
Tolerance realities matter immensely here. Manufacturers machine these parts to slightly negative tolerances. For example, they might machine a nominal 65mm diameter to 64.9mm. This minus tolerance allows insertion without binding. If engineers machined it to exactly 65.0mm, friction would prevent assembly. The part must slide in smoothly but remain tight enough to prevent lateral slop.
This defines the internal measurement between the bucket ears. Operators also call these mounting brackets. It dictates how the bucket fits over the dipper arm and H-link. If this gap is too narrow, the bucket simply will not slide over the arm. If the gap is too wide, the bucket slides side to side during operation. Mechanics use shims to correct minor wide gaps, but securing the correct factory dimension always provides the best structural result.
This measures the exact distance from the center of the front pivot point to the center of the rear pivot point. You need this metric to ensure proper curling geometry. Incorrect center distances restrict rotation. They might also cause the hydraulic cylinder to overextend. Furthermore, this dimension proves critical for quick-hitch compatibility. Most quick couplers require exact center-to-center distances to engage their locking mechanisms safely.
Precision requires the right tools and correct techniques. Measuring heavy machinery parts in the dirt requires patience. A rushed measurement inevitably leads to a rejected parts order.
You must mandate the use of digital or Vernier calipers for all measurement tasks. We explicitly advise against standard tape measures for diameter measurements. Tape measures introduce unacceptable margins of error. A tape measure cannot read 0.1mm increments. Eyeballing a tape measure curvature over a round surface always yields wrong data.
Follow these numbered steps to accurately size your excavator arms excavator bucket pin:
Sometimes original parts get lost, completely destroyed, or excessively deformed. When this happens, measure the internal diameter of the arm bosses instead. Insert the internal jaws of your digital caliper into the machine's bore. Measure across the widest point. Again, measure at multiple angles. Bosses also wear into oval shapes. If the boss shows severe ovality, you cannot simply insert a new part. You must line-bore the arm first to restore a perfect circle.
You must record every dimension in precise millimeters (mm). The global heavy equipment industry operates strictly on metric sizing. Avoid measuring in inches. Converting fractional inches to millimeters often leads to costly rounding errors. A 2.5-inch reading converts to 63.5mm, which might incorrectly prompt you to order a 65mm standard part. Stick strictly to metric readings from the start.
Knowing your measurements is only half the battle. You must then match those metrics to available inventory. Sometimes a standard excavator bucket pin fits perfectly. Other times, complex aftermarket modifications require unique engineering.
Original Equipment Manufacturer (OEM) sizing charts offer a great starting point. You cross-reference your machine make, model, and operating weight. For instance, a CAT 320 will have drastically different specifications than a Komatsu PC200. These reference charts list the nominal factory dimensions. If your machine is relatively new and unmodified, standard OEM replacement parts usually slide right in.
However, standard charts have strict limits. They fail completely in several common real-world scenarios. Older machines often feature heavily modified linkages. Previous owners might have repaired damaged arms by line-boring them to oversized dimensions. If an arm bore increased from 65mm to 70mm, a factory standard chart becomes useless. Furthermore, integrating aftermarket quick couplers often changes the required ear-to-ear clearance or center-to-center distances.
Certain operational challenges demand specialized hardware. Specifying a custom excavator bucket pin becomes absolutely necessary when:
To clarify the decision process, review this comparison chart of standard versus custom scenarios:
| Equipment Condition | Recommended Sizing Approach | Common Use Case |
|---|---|---|
| Factory original, unmodified linkage | Standard OEM Charts | Replacing worn parts on a standard 3-year-old excavator. |
| Worn bosses, recently line-bored | Custom Oversized Machining | Repairing a 10-year-old machine with severe slop. |
| Adapting mixed-fleet buckets | Custom Stepped Machining | Fitting a 20-ton bucket onto a 15-ton excavator arm. |
| Aftermarket automated greasing | Custom Port Alignment | Upgrading fleet to centralized lubrication systems. |
Finding the right component involves finding the right manufacturing partner. You cannot trust cheap, unverified steel on a 30-ton machine. You need a highly vetted excavator bucket pin supplier to ensure safety and longevity. Use this checklist to evaluate potential vendors.
Steel quality defines the lifespan of your heavy machinery. Look for induction-hardened steel. EN19T or 4140 grades represent industry gold standards. These specific alloys provide an exceptional balance. Induction hardening gives the exterior high surface hardness to resist abrasion from dirt and rock. Simultaneously, the manufacturing process leaves a ductile, softer core inside. This ductile core absorbs heavy shock loads. It prevents the metal from snapping abruptly during high-stress breakout forces.
Ask potential suppliers directly about their machining precision. Request specific details regarding their quality control processes. A reputable vendor easily explains their negative tolerance standards. They should guarantee that a 65mm order arrives slightly under 65mm for proper clearance. If they cannot explain their dimensional control methods, find another vendor.
Evaluate their ability to dispatch standard components immediately. Downtime costs thousands of dollars per day. A good vendor keeps extensive stock of common OEM sizes. Additionally, ask about their turnaround times for custom machining projects. If you need a stepped design, you need to know if it takes three days or three weeks.
Mistakes happen in heavy manufacturing. You must ensure they offer transparent, no-nonsense return policies. If the specified dimensions fail to fit due to their manufacturing errors, you need immediate recourse. Trustworthy vendors stand behind their caliper readings and their lathes. They will replace improperly machined parts without arguing.
Sizing your components correctly bridges an essential gap. It separates an unstable attachment causing severe equipment damage from one performing safely and efficiently. Precision prevents structural failures. It stops accelerated wear on your dipper arm and eliminates the frustration of field installation delays.
Your next steps are straightforward. First, gather your digital calipers and clean your machine's joints. Second, document the three critical dimensions—diameter, dipper gap, and pin centers—strictly in metric millimeters. Third, identify unworn sections on your old parts to verify factory sizing. Finally, consult an engineering sizing chart or contact an expert manufacturer to secure your exact replacement parts. Do not guess; measure exactly.
A: No. Even a 1mm discrepancy causes linkage play. This movement acts like a hammer, accelerating wear on the bucket ears and dipper arm. Eventually, you will require expensive line-boring repairs to fix the ovality created in the bosses.
A: While critical for quick hitches, pin centers also dictate the curling geometry of the bucket. Incorrect center distances can restrict bucket rotation entirely. They can also cause the hydraulic bucket cylinder to overextend, leading to severe seal damage.
A: Greaseable pins feature internal channels for lubrication. If your excavator arm or bucket link does not have external grease fittings for the joint, you must specify greaseable pins. This internal lubrication prevents catastrophic seizing during heavy digging operations.